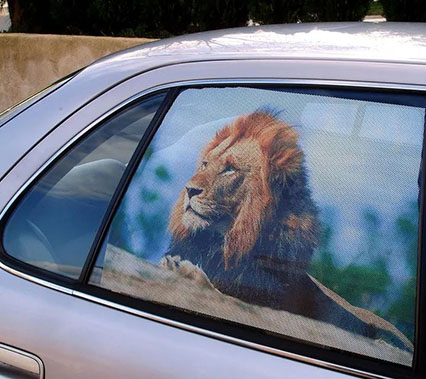
How Sign Makers Can Store, Apply, and Remove Adhesive Vinyl Sheets Without Ruining a Job
Know What You Are Working With Before You Cut a Single Sheet
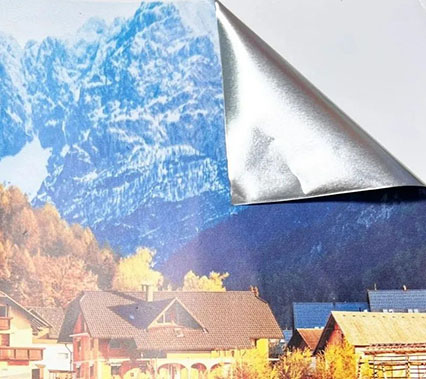
Every adhesive vinyl failure traces back to one of three root causes: the material was stored wrong, it was applied under poor conditions, or it was removed with the wrong technique. Before any of that matters, though, a shop needs to know exactly what substrate is on the roll. Calendered vinyl, cast vinyl, reflective film, static cling, and specialty overlays such as an aluminum foil sticker film all behave differently under heat, humidity, and mechanical stress.
Calendered vinyl is thicker and more prone to shrinkback, which makes it a poor choice for vehicles with compound curves. Cast vinyl is thinner, more conformable, and dimensionally stable, so it tolerates wraps and rivets far better. Specialty substrates add another layer of complexity: magnetic sheets carry a ferrite-loaded backing that changes how they should be rolled and stacked, while an ultra clear polyester overlay is engineered for optical clarity rather than conformability, so it is unforgiving of trapped dust or fingerprints during lamination.
Matching the substrate to the job before storage or installation begins prevents most of the downstream problems covered in this guide.
Store Vinyl Rolls the Way the Adhesive Was Engineered For
Adhesive is a living chemical layer, not an inert coating. Heat, humidity, and gravity all act on it continuously, even while a roll sits untouched on a shelf. Improper storage is one of the most common and most preventable causes of edge lifting, adhesive transfer, and color shift months after installation.
| Storage Factor | Recommended Range or Practice | What Happens If Ignored |
|---|---|---|
| Ambient Temperature | 60 to 80 degrees Fahrenheit | Adhesive hardens in cold, over-softens and oozes in heat |
| Relative Humidity | 40 to 60 percent | Moisture migrates into the liner, causing bubbling on unroll |
| Roll Orientation | Stored upright on end, never stacked flat | Flat stacking creates pressure rings and edge ooze |
| Light Exposure | Kept out of direct sunlight and UV-emitting fixtures | Premature yellowing and adhesive brittleness |
| Shelf Life Tracking | First-in, first-out rotation with date labels | Aged adhesive loses tack and grabs unevenly |
Rolls that include a metallic layer, such as an aluminum-backed sticker stock, deserve extra caution around humidity. Trapped moisture between foil and liner can corrode the metallic layer from the inside, and the damage is invisible until the sheet is unrolled for cutting. A dedicated rack with individual slots, rather than a bin where rolls lean against each other, keeps pressure off the edges and prevents the telescoping that ruins the first few feet of every roll.
Get the Environment Right Before the Squeegee Ever Touches the Film
The best temperature to apply a vinyl decal sits in a narrower band than most shops assume. Application outside that band does not always fail immediately; it often fails weeks later, when the adhesive has fully cured under the wrong conditions.
- Surface and air temperature between 50 and 90 degrees Fahrenheit gives the adhesive enough mobility to wet out the substrate without becoming too soft to control.
- Below 50 degrees, adhesive tack drops sharply, and the film will appear to bond but lift at the edges within days.
- Above 90 degrees, the adhesive can grab instantly on contact, making repositioning impossible and trapping air under the film.
- Substrate temperature matters more than room temperature; a metal panel sitting in direct sun can be 20 to 30 degrees hotter than the surrounding air.
- Relative humidity above 70 percent slows solvent flash-off in wet-applied films and increases the risk of hazing under lamination.
Surface preparation is the other half of this equation. Isopropyl alcohol at roughly 70 percent concentration removes oils without leaving a residue film behind, and a lint-free cloth prevents fiber contamination that would otherwise telegraph through a thin, glossy overlay.
A Repeatable Six-Step Application Sequence
Consistency matters more than speed. Shops that document and repeat the same sequence on every job see far fewer callbacks than shops where technique varies by installer.
Two details in this sequence are frequently skipped. First, releasing the liner gradually rather than pulling it off in one motion keeps the film from folding onto itself, which is the single most common cause of a ruined sheet on a large install. Second, post-heating with a heat gun set to a moderate, even temperature relaxes the film so it settles fully into contours and edges instead of springing back over the following days.
Technique Differences for Curved and Textured Surfaces
Learning how to apply a vinyl wrap to a flat sign panel and learning how to apply a vinyl wrap to a vehicle body are related but not identical skills. Compound curves stretch the film in two directions at once, and cast vinyl is formulated specifically to tolerate that stretch without the memory that would otherwise pull it back toward its original flat shape.
Working With Rivets and Recessed Panels
Rivets and body lines need localized heat and a firm, small squeegee or a heat-resistant glove to push the film down into the recess without stretching the surrounding area too thin. Overheating a small area to force conformability often thins the film enough that the substrate color shows through, especially on lighter colors.
Working With Ferrous or Uneven Substrates
On applications where a temporary, removable graphic is preferred over adhesive at all, magnetic sheets offer an alternative that avoids adhesive residue entirely. They still require a clean, dry surface for full magnetic contact, since dust or moisture trapped between the sheet and the panel reduces holding strength and can allow the sign to shift or lift at highway speeds.
Working With Optical Overlays
Clear protective films demand the cleanest environment of any application type, since any trapped particle is magnified rather than hidden. An ultra clear pet film overlay should be applied in a space with filtered air or, at minimum, away from active cutting and sanding operations that generate airborne debris.
Removing Vinyl Wrap Without Damaging the Substrate
Removal is where rushed jobs get expensive. Heat is the primary tool: warming the film to roughly 150 to 200 degrees Fahrenheit softens the adhesive enough to peel at a low, steady angle rather than pulling straight up, which tears the film and leaves adhesive behind.
- Warm a small section with a heat gun on a low or medium setting, keeping the nozzle moving to avoid scorching paint or clear coat.
- Peel the film back on itself at roughly a 180 degree angle, following immediately behind the heat source.
- Reheat as needed rather than forcing a cold section; forcing a peel is what leaves torn fragments and adhesive strings.
- Once the bulk of the film is removed, address any remaining adhesive residue with a dedicated wrap adhesive remover rather than an abrasive pad.
- Wipe the surface with isopropyl alcohol to lift any oily residue left behind by the remover itself before applying a new graphic.
A common mistake is using an aggressive solvent on painted surfaces without testing an inconspicuous spot first. Some solvents strong enough to dissolve adhesive quickly can also soften certain clear coats, particularly on older or previously repainted panels. A slower approach with a milder, citrus-based or specifically formulated adhesive remover protects the finish underneath.
Diagnosing Common Installation Defects
| Defect | Most Likely Cause | Correction |
|---|---|---|
| Bubbling under film | Trapped air or moisture, contaminated surface | Puncture and re-squeegee, or reheat and reapply |
| Edge lifting after days | Application below recommended temperature | Reheat edges and press firmly with a squeegee |
| Silvering or hazing | Insufficient squeegee pressure or overlap | Reheat and re-squeegee with tighter overlap passes |
| Adhesive residue after removal | Cold peel or aged adhesive | Reheat and use a wrap adhesive remover |
| Color shift near edges | Overheating during post-heat step | Lower heat gun temperature and increase distance |
Matching Material Choice to the Job at Hand
Storage, application, and removal behavior all shift depending on which substrate is on the roll. The comparison below reflects general handling characteristics rather than any single product line.
| Material | Storage Sensitivity | Best Suited For | Removal Difficulty |
|---|---|---|---|
| Aluminum Foil Sticker | High, sensitive to humidity corrosion | Decorative panels, nameplates, industrial labeling | Moderate, benefits from low heat |
| Magnetic Sheets | Low, but must stay flat, never rolled tightly | Temporary vehicle signage, removable displays | Low, no adhesive residue to address |
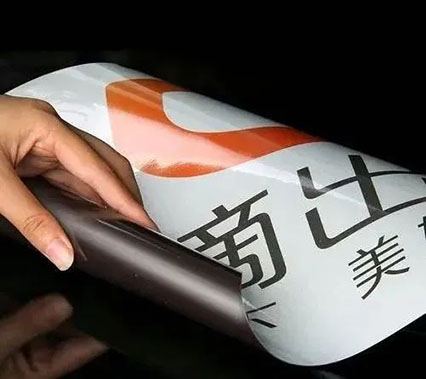
| Ultra Clear PET Film | Moderate, sensitive to dust and static | Protective overlays, optical windows, screens | Moderate, requires clean removal to avoid haze |
A Quick Pre-Job Checklist Worth Posting on the Wall
Most vinyl failures are decided before the squeegee ever touches the film. Storage conditions and surface prep account for the majority of callbacks a typical sign shop sees.
- Confirm roll storage temperature and humidity logs are within range before pulling material for a job.
- Check the substrate and air temperature at the install location, not just the shop average.
- Clean the surface with alcohol and a lint-free cloth immediately before application, not hours ahead of time.
- Release the liner gradually and squeegee from the center outward on every application.
- Post-heat contours and edges rather than assuming the film will settle on its own.
- Keep a dedicated wrap adhesive remover on hand rather than improvising with general solvents.
Frequently Asked Questions
Q1: How should rolls of vinyl be stored between jobs?
Store rolls upright on end in a rack, at 60 to 80 degrees Fahrenheit and 40 to 60 percent relative humidity, away from direct sunlight, and rotate stock so older rolls are used first.
Q2: What is the best temperature to apply a vinyl decal?
Aim for a substrate and air temperature between 50 and 90 degrees Fahrenheit. Outside that range, adhesive either fails to tack properly or grabs too fast to allow repositioning.
Q3: How do you remove vinyl wrap adhesive without damaging paint?
Warm the residue gently, then use a wrap adhesive remover formulated for painted surfaces rather than an abrasive pad or an overly aggressive solvent, and always test an inconspicuous spot first.
Q4: Can magnetic sheets be rolled up for storage like vinyl film?
No. Magnetic sheeting should be stored flat, since rolling it tightly can weaken the magnetic backing and create a permanent curl that reduces surface contact once installed.
Q5: Why does clear film show bubbles more than colored vinyl?
Clear film has no pigment to visually mask trapped air or dust, so even minor contamination becomes visible, which is why a low-dust environment matters more for optical overlays than for standard colored vinyl.